
Faculty/Staff IT Guides

Our goal is to ensure that staff & faculty have full access to all available resources to complete their work. We have complied a list of the most common issues faculty & staff have experienced at their time at NLU. Please look over the list to see if your issue is listed, and follow the steps to resolve it. If your issue is not listed, and/or you require additional assistance, please reach out to the Helpdesk.
Account
If you have forgotten your password or are having trouble logging in, then resetting your password can help you regain access to the account. To reset your password follow the instructions below:

Guide download: Password Reset PDF
Your account might get locked out due to a few different reasons. If you have experienced your account getting locked, please reach out to helpdesk@nl.edu or call (312)261-3700.
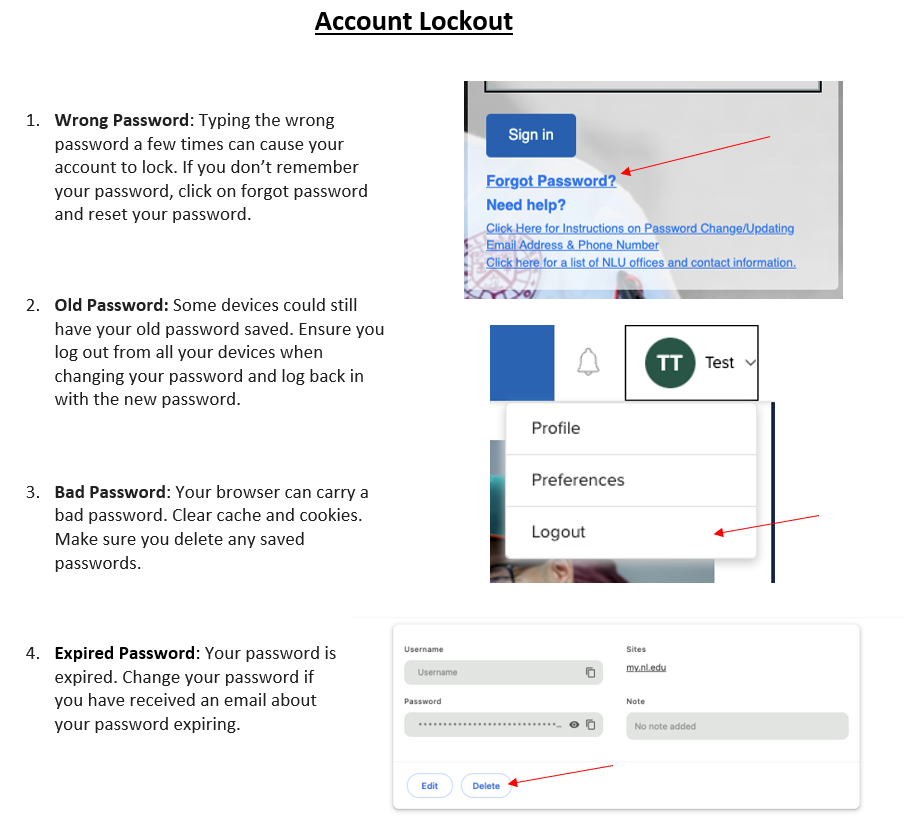
Guide download: Account Lockout PDF
Guide to Google Workspace Account
- To enable your Google Workspace Account, please complete the request form.
- If you have created a Google account using your NLU email, then the Google Email will ask to transfer the account to NLU.
- Once the form is filled out, it will be sent to IT, and we will create an account for you using the information provided.
- The IT team will send out an email with your account information and instructions on resetting your password.
- Note: The password for your Google Workspace account should be different from your NLU portal account.
- Note: If the acceptable Use Policy Agreement is not accepted, the account will not be created.
Guide download: Guide to Google Workspace Account PDF
You can find the Google Account Request Form Below:
Google Account Request Form

In order to connect to campus printers you must to use a NLU laptop. The way you connect to the campus printers can depend on what operating system you are using. Below are the steps for connecting to the printers while on Windows or Mac.
How to Add Campus Printers (Windows)
-
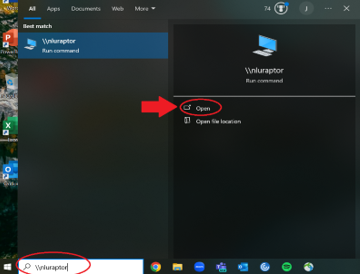
Go to the Windows search bar on the bottom left of your device's screen and type in \\nluraptor. This should open a tab with NLU printers.
-
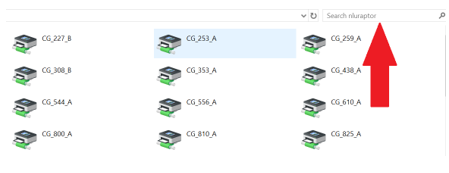
On the top right of the search bar, type in the name of the printer you are trying to connect to. The name of the printer should be written on the printer. For example: CH_3050_A
-
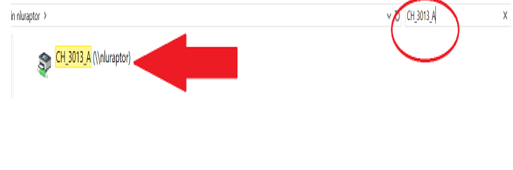
Once you have found the right printer to connect to, double click, and you will see the connection loading. It may ask you to approve the app to make changes on your computer. Click Yes. After the connection is complete, you can print from that printer.
How to Add Campus Printers (Mac)
-
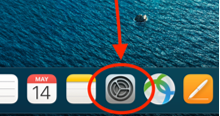
Navigate to the the Dock at the bottom of your screen. Select and open the System Settings Icon.
-
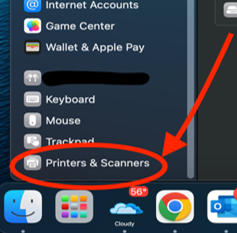
On the left side of the window, scroll down until you see the Printers & Scanners section. Select it and open it.
-
Once you have opened Printers and Scanners, click Add a Printer, Scanner, or Fax Machine at the bottom right. Open it and select the printer you want.
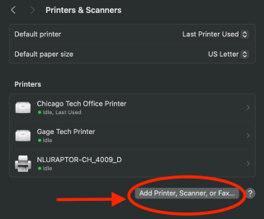
- Once you have opened Printers and Scanners, you can search for the printer you need. Type the printer's name, and it will appear as an option.
-
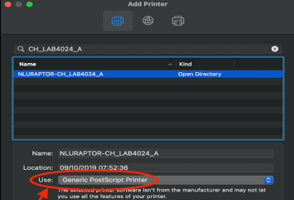
After selecting the printer you want, select a Printer Driver at the "Use" option. After doing so, select "Generic PostScript Printer," then hit Add.
Software
VPN Access is required if you are working offsite from any one of our campuses and need to connect NLU Services such as Shared Drives, Jabber, Monthly Timecard and more. To connect to the VPN follow the steps below.>
Guide to Connecting to VPN
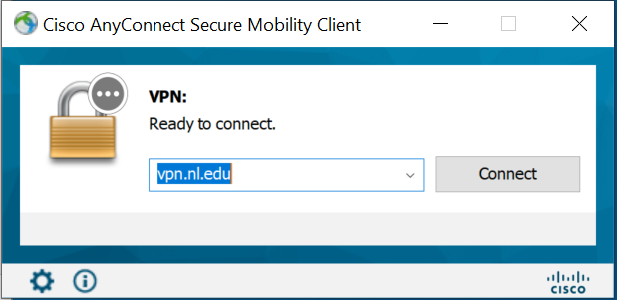
- Navigate to Cisco. On Windows, press the Windows key. On Mac, go to Launchpad. Search for "Cisco AnyConnect" and open the app.
-
In the VPN, type "vpn.nl.edu" and click connect. Enter your NLU credentials.
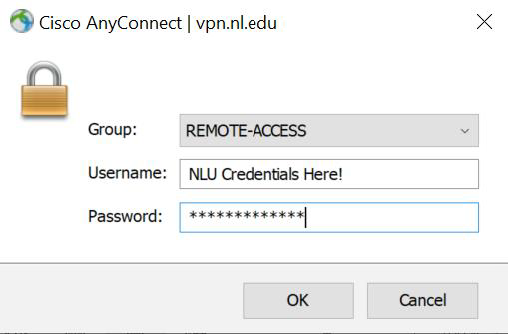
- You will receive a DUO push notification on the app. Tap to approve.
-
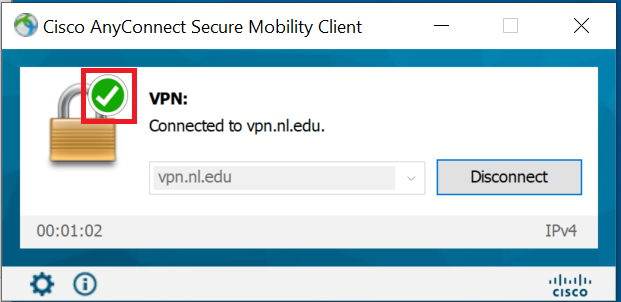
Verify connection. Search for the "Cisco AnyConnect" app again and check that the green check mark is on.
Guide download: Guide to VPN Connection PDF
If you have tried these steps and are still unable to connect to the VPN, please contact the helpdesk. Click here for our contact page: Get Help
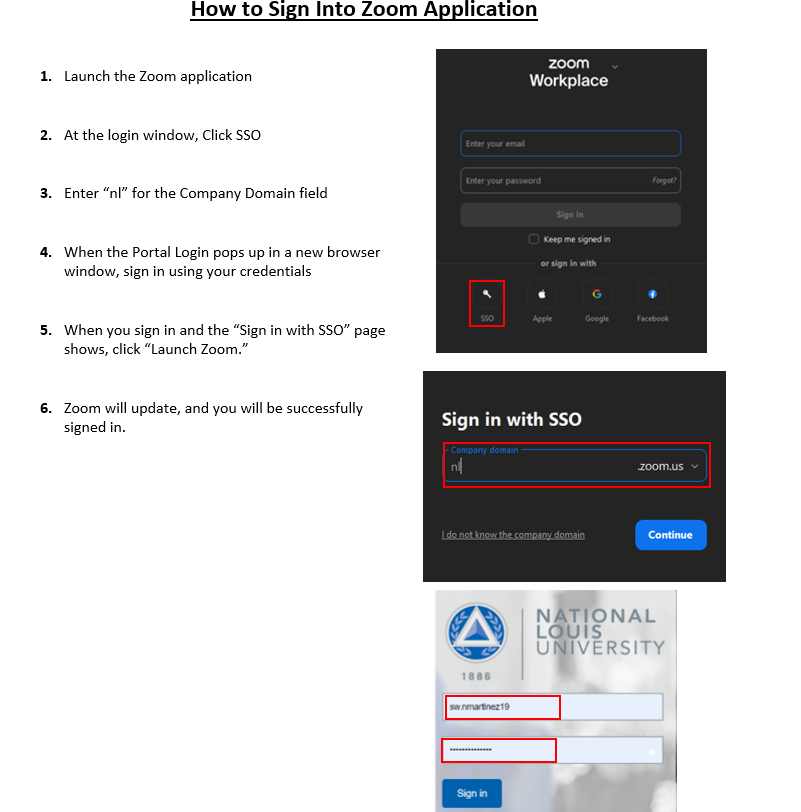
Guide download: How To Sign Into Zoom PDF
Accessing your Adobe Cloud is important, as it offers many of the apps we use daily. Here's how you can access your Adobe Cloud Account.
Adobe Cloud Access
- On your NLU computer, find and open "Adobe Creative Cloud."
- When asked to log in, enter your NLU email and click continue.
- You will be redirected to the NLU SSO login screen. Log in using your NLU username and password.
- Once logged in, you will be redirect to Adobe Creative Cloud, where you will see all your apps.
Guide download: Adobe Cloud Access PDF

If you receive a BitLocker screen on your machine, use the following steps:
-
Take note of the first eight letters and digits of your Recovery key ID.
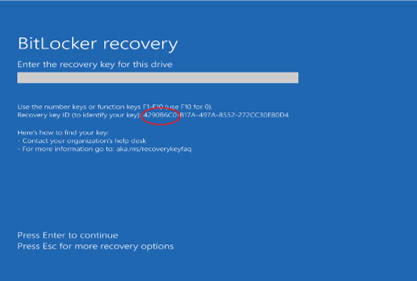
- Have this information ready and reach out to the helpdesk, and one of our support specialists will provide you with the password to unlock your device.
You can find the contact information for the helpdesk here: Help Desk Contact
Users who need access to a shared mailbox need to be granted permission on the back end. A supervisor would need to send an email requesting access to that shared mailbox for that individual, the email can be sent to any of the techs or helpdesk@nl.edu . After the request has been sent and the changes have been made there are two ways to access the mailbox depending on your operating system.
The guide downloads are linked below:
Windows: Access Shared Mailbox on Windows
Microsoft Teams
Windows 11
Windows 11 Guide
